3. Setup and Design

The setup and design process involved in setting up a campaign is explained. MailDrip is designed as an email marketing platform with a clean, simple, and easy-to-use interface with zero coding skills required. This makes it easier for anyone to get started.
Getting Started
The image below shows what your campaign dashboard looks like at a first glance. You can then choose the section of the dashboard that you wish to work on.
Setting up a campaign
The following steps will guide you to set up a campaign and create drip emails.

Step 1

Click on Create New.

Step 2

After step 1, you will be required to choose an Email Builder where you get to decide whether you want to use an existing layout or create one from scratch.

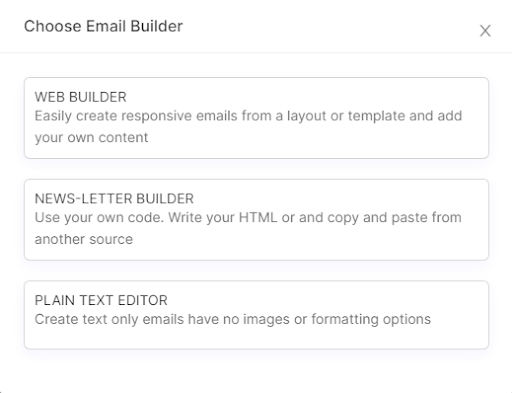
Clicking on Web Builder introduces you to layout options, templates, or designs from previous emails created. This option works perfectly for beginners and anyone who does not wish to spend extra time building their designs from scratch.

The Newsletter Builder option is for developers who would rather write their codes or for people who have existing HTML codes that would work perfectly for their newsletter.

The Plain Text Editor works for anyone who prefers the plain old method of writing letters without any formatting option.

Step 3

After choosing your preferred email builder, set up your email and proceed to the next stage where the image below pops up.

Step 4

Enter your subject and set a specific interval for this email, if you wish. This interval decides when this particular email is triggered for your subscribers, which could be after the last email or after subscribing (if this is the first email in the campaign). This is optional, so you could also leave it blank and the default setting for the campaign interval will be applied.

Step 5

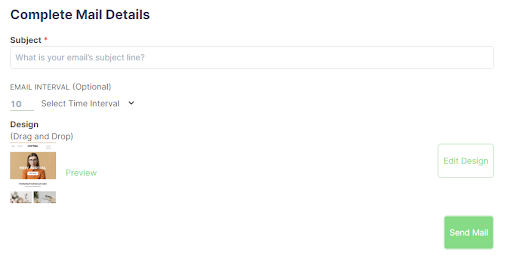
Click on Send Mail to save your campaign details.